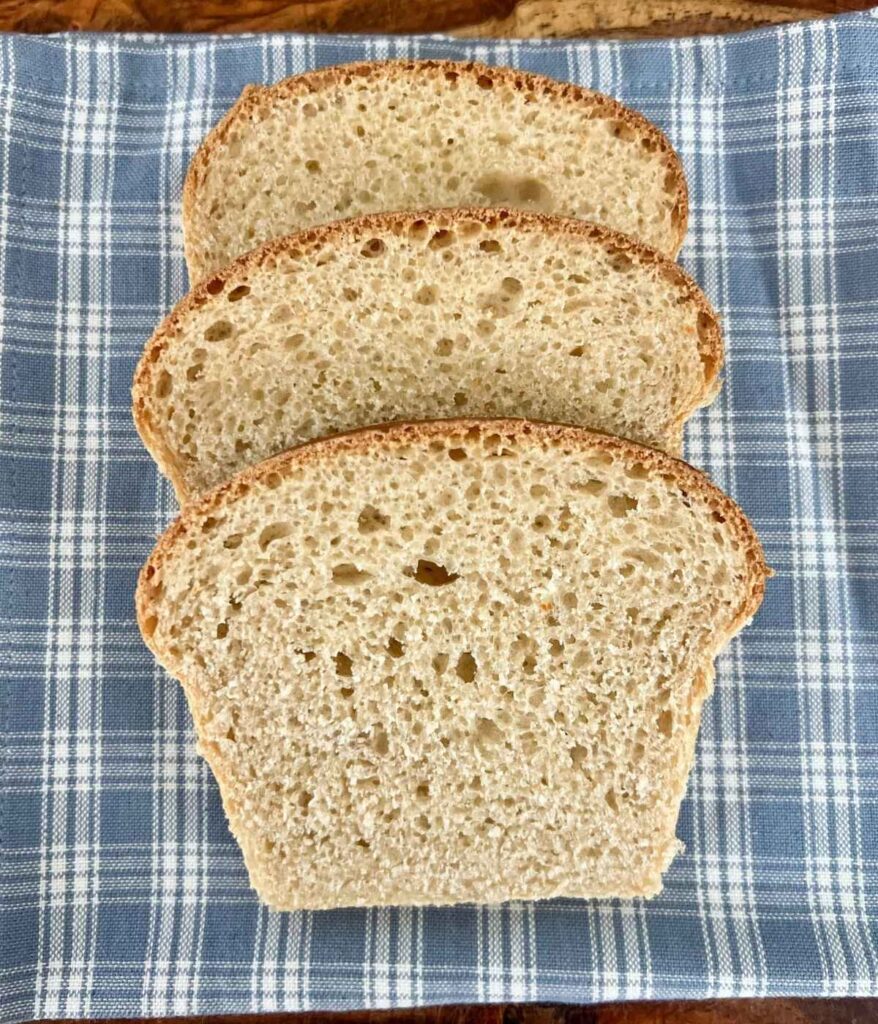
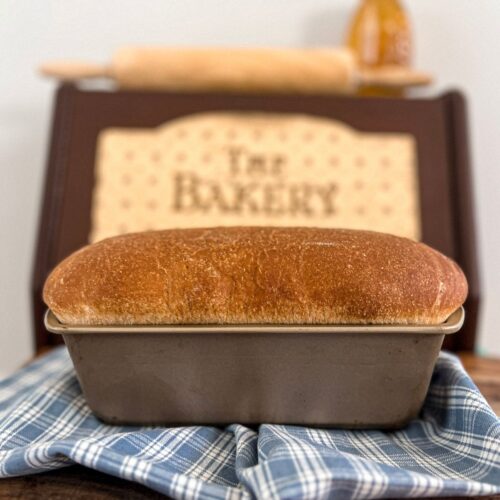
Honey Wheat Sourdough Sandwich Bread
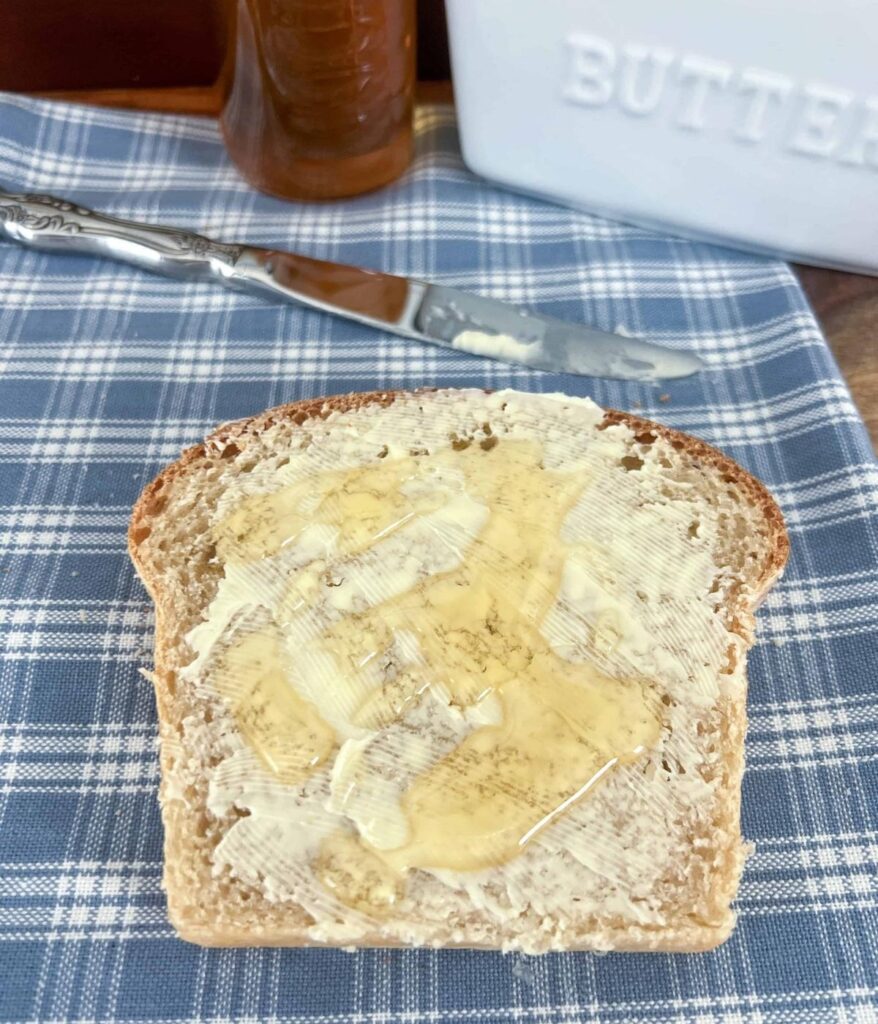
Simple and soft with a touch of sweetness and no artificial ingredients, this honey wheat sourdough sandwich bread will keep your stomach satisfied and your mind feeling guilt free. You will love baking this bread! Serve with warm butter and honey or spread some easy blueberry bourbon preserves (no pectin) to make a delicious twist on peanut butter and jelly sandwiches.
Growing up, I loved going to the grocery store with my mom and dad. When we were finally old enough, my siblings and I would be given items to hunt down and bring back to the shopping cart. My job was usually to get the bread for the week and I would ALWAYS pick honey wheat bread. For some reason I was obsessed with the idea that a company would put an extra touch of sweet honey into their bread.
As an adult now acquainted with the beauty of sourdough, I absolutely love that this recipe blends the nostalgia of childhood with the health benefits of sourdough bread (better digestion, no preservatives or fillers, etc.).
Even better, this bread FREEZES super well! You can use it to make and freeze peanut butter and jelly sandwiches, which is far less expensive than purchasing the frozen peanut butter and jelly sandwiches at the grocery store.

Honey Wheat Sourdough Sandwich Bread
The Ingredients
Bread Flour: Has a higher gluten content, which allows for light and fluffy ‘bread’ texture.
Whole Wheat Flour: Gives the bread a wholesome taste. High in fiber. High in B vitamins, vitamin E, iron, zinc, and magnesium.
Salt: A generic iodized table salt works best. Salt helps regulate yeast fermentation and helps prevent over proofing.
Butter: Enhances the flavor and makes the bread softer by coating the gluten strands.
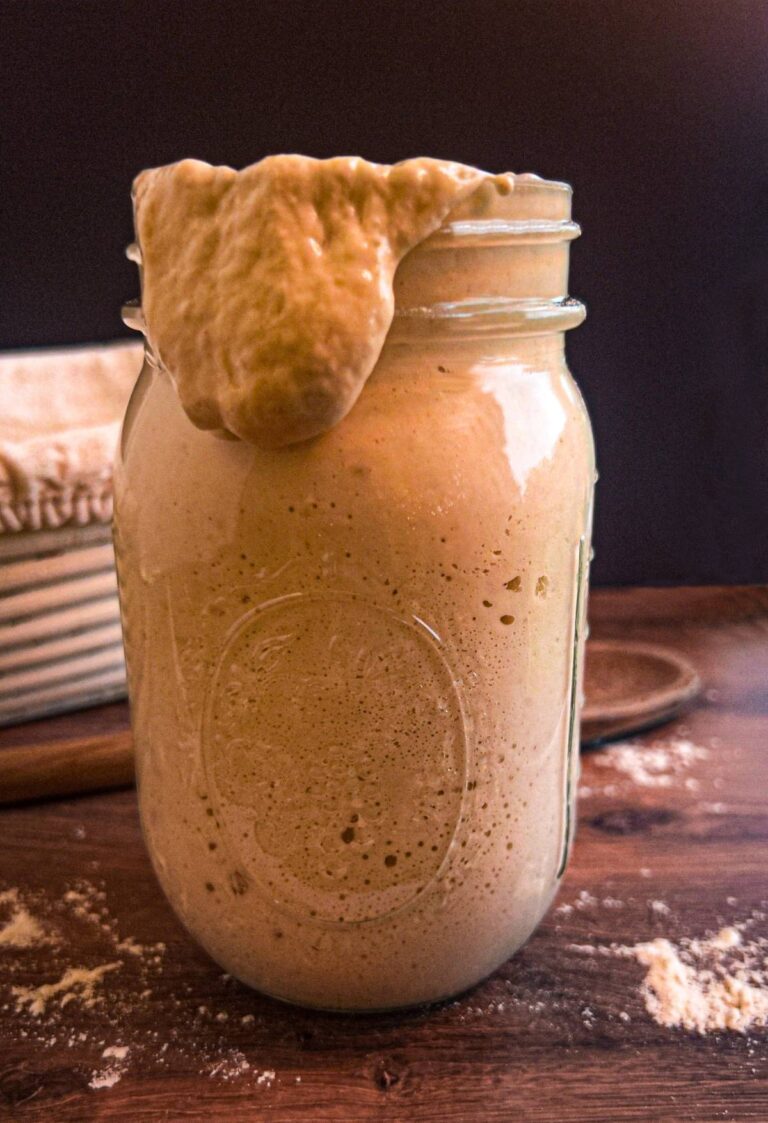
Activated Starter: Starter that is “activated” has risen double its height and floats on top of water.
Honey: A natural sweetener and helps to caramelize the crust.

The Equipment
Kitchen scale
Whisk
Stand mixer
Paddle attachment for mixer (also known as a flat beater)
Dough hook attachment for mixer
Spatula
Damp towel or plastic wrap
Nonstick baking spray (like one of these)
8.5 x 4 inch bread pan
Sourdough Feeding and Rising Schedule
NOTE: If your sourdough has been fed regularly then it should double in size within a day.
Morning Day 1: Feed sourdough starter (1:1:1 ratio of at least 60 grams each).
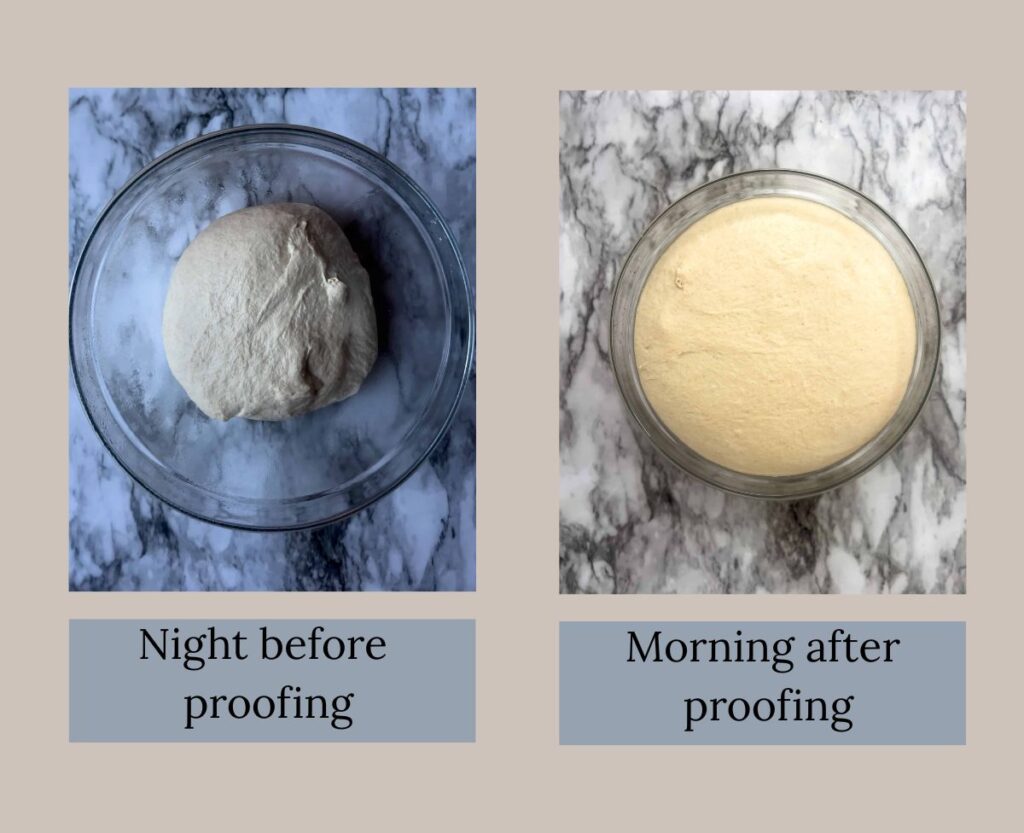
Afternoon/Evening Day 1: Mix ingredients to make dough; cover and let rise at room temperature overnight.
Morning Day 2: Shape Dough; Let rise in bread pan.
Morning/Afternoon Day 2: Bake.
How To Make Honey Wheat Sourdough Sandwich Bread
Mix The Dough:
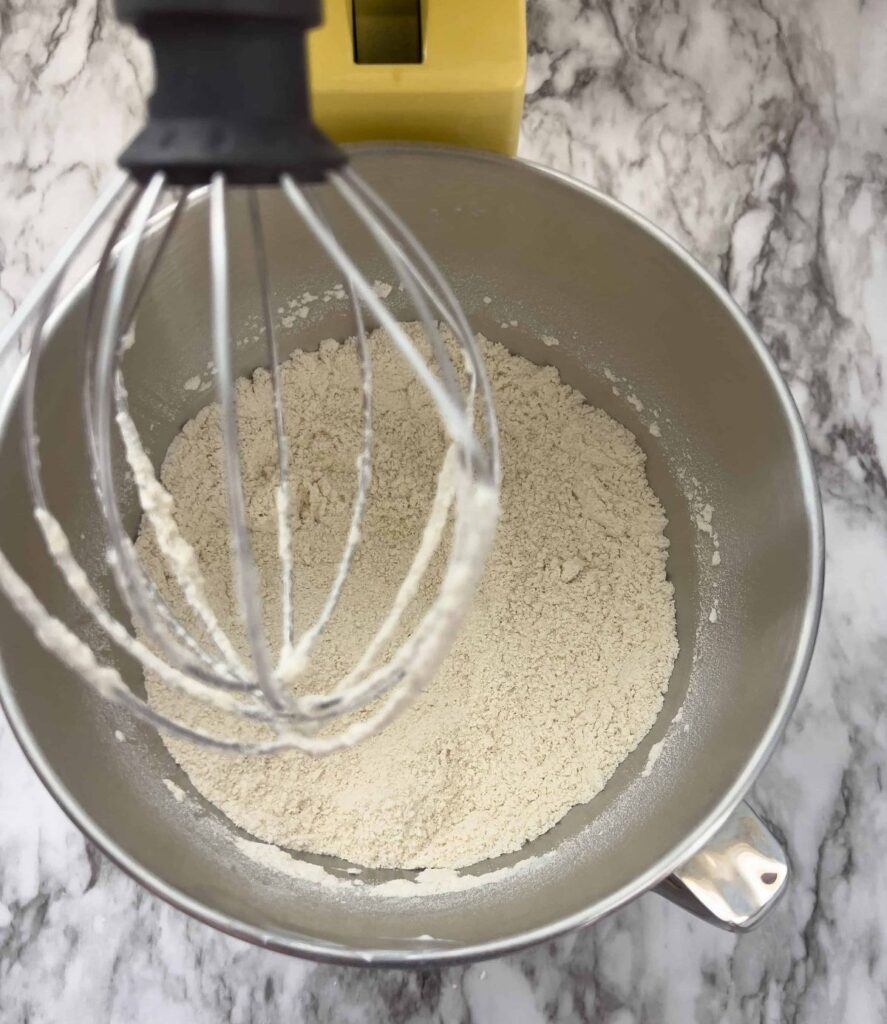
Be sure to use a kitchen scale when measuring out your ingredients. This allows for better accuracy than with measuring cups and reduces that chance of error when baking. Using the paddle attachment, mix the dry ingredients on low speed. Measure out the salt by itself to make sure that any extra doesn’t spill into the bowl with the other ingredients.
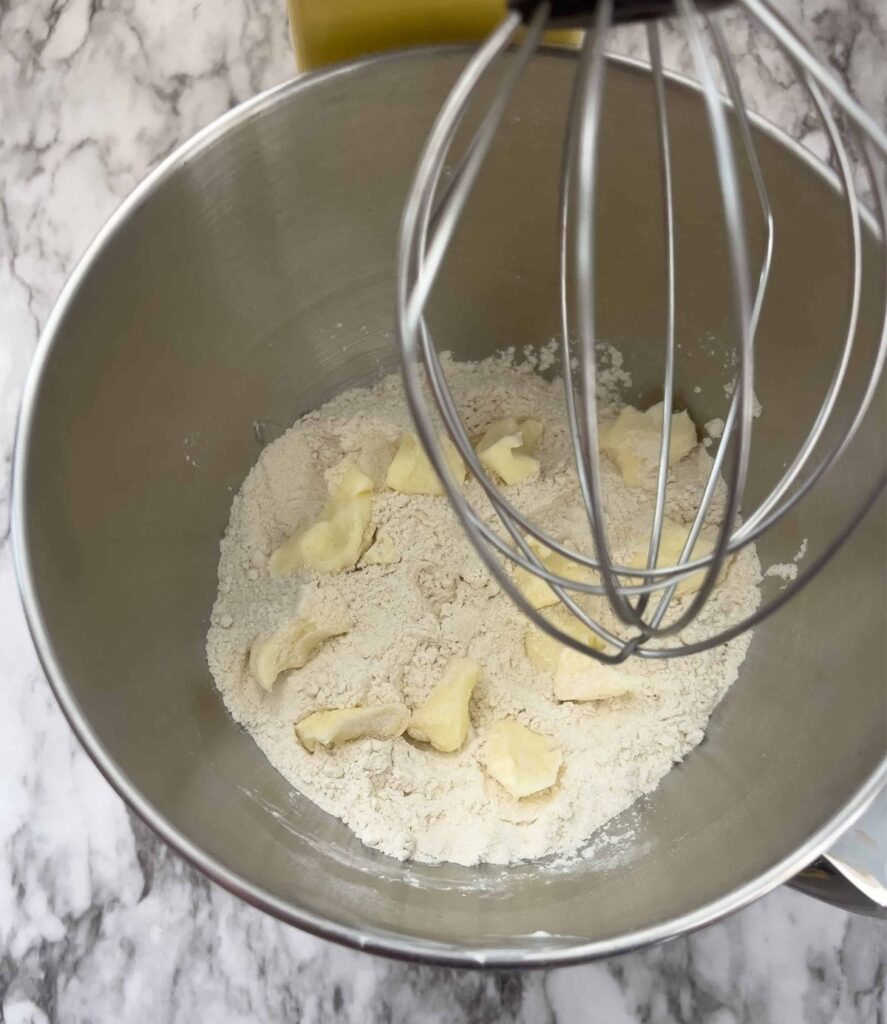
Mix in the butter on low speed until the mixture looks like crumbs. If you forgot to let your butter warm to room temperature, you can heat it in the microwave in 5 second increments until soft.
Add the wet ingredients and mix until the dough is sticky to the touch.
Let The Dough Rest:
Cover with a moist towel or plastic wrap and let rest for 30 minutes.
Knead The Dough:
Knead the dough on low to medium speed for 6-8 minutes. If you are kneading by hand, knead for 8-10 minutes.
Bulk Rise:
Cover the dough with plastic wrap (keeps the top of the dough from drying out) and let rise overnight at room temperature.
Shaping The Dough:
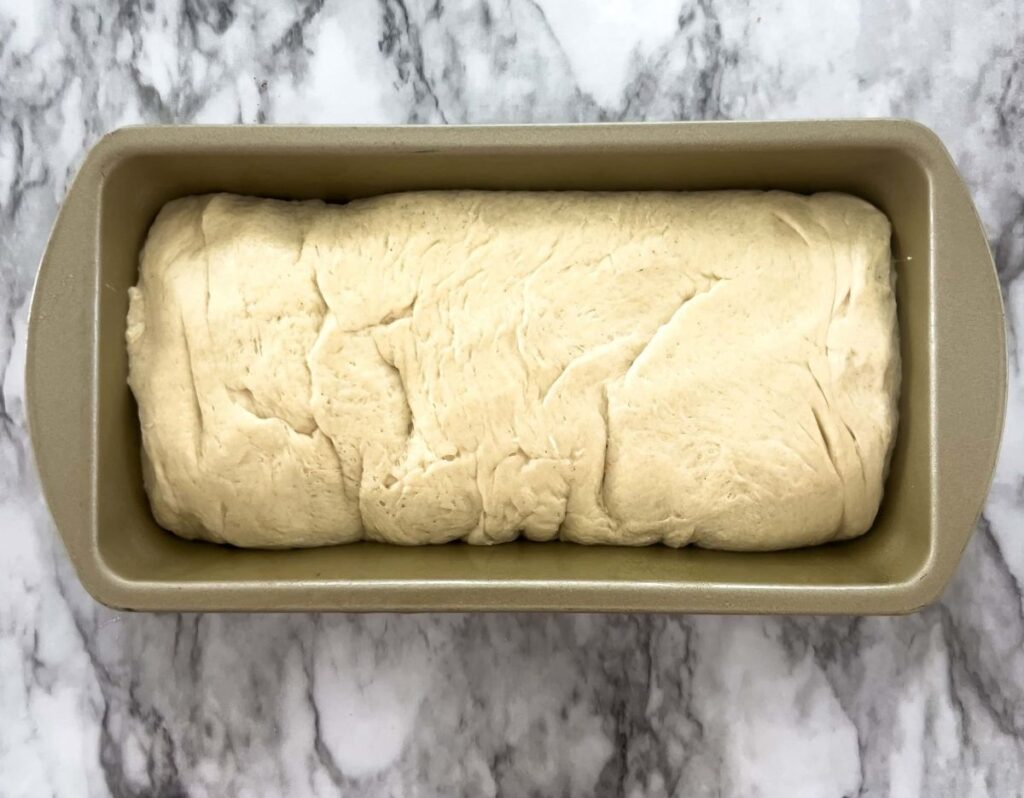
In the morning, place dough on a lightly floured surface. Shape into a rectangle that matches the length and width of your bread pan. Be sure to press out any air bubbles. Fold the long edges toward the center and fold the short ends upward. Flip over and place into the greased bread pan.
Second Rise:
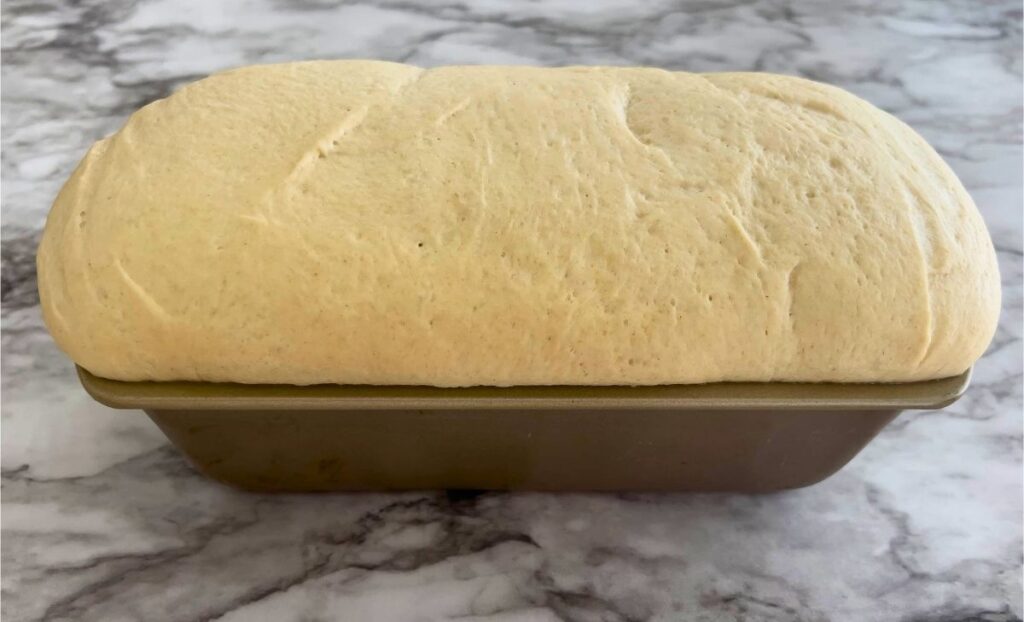
Let the dough rise until the top is about one inch above the rim of the pan.
Bake:
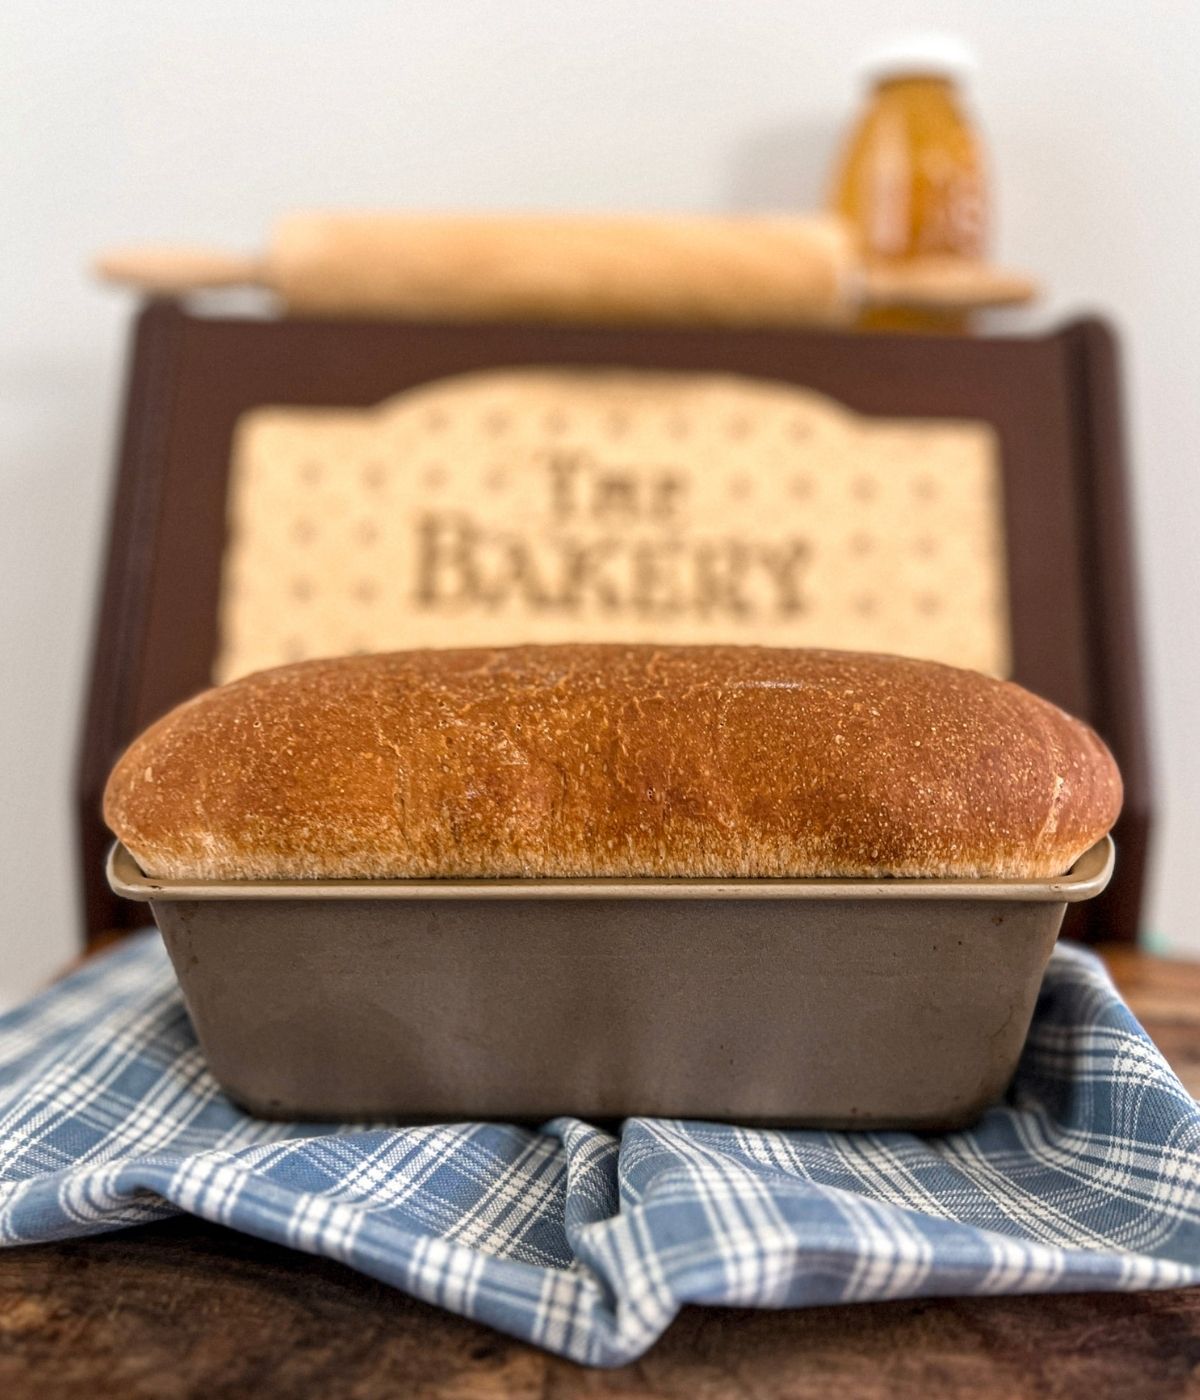
Bake at 375 degrees Fahrenheit for 45-50 minutes on the center rack. When the bread is done, take the loaf out of the pan and let it cool completely before cutting with a bread knife.
Honey Wheat Sourdough Sandwich Bread
Equipment
- Kitchen scale
- Whisk
- Stand mixer
- Paddle attachment for mixer
- Dough hook attachment for mixer
- Spatula
- Damp towel or plastic wrap
- Nonstick cooking spray like Baker’s Joy or La Tourangelle
- 8.5 x 4 inch bread pan
Ingredients
- 400 grams bread flour
- 100 grams whole wheat flour
- 9 grams salt
- 72 grams unsalted butter (5 tbsp) room temperature, cut into cubes
- 250 grams water room temperature
- 150 grams activated starter 100% hydration
- 36 grams honey (3 tbsp)
Instructions
- In the bowl of a stand mixer, mix the bread flour, whole wheat flour, and salt until the ingredients are evenly distributed. Using a butter knife or your fingers, break the room temperature butter into small cubes and add to the flour and salt mixture. Using the whisk attachment, mix the ingredients in a stand mixer on low for 2-3 minutes until crumbly. (You can mix by hand until crumbly as well).
- Remove the whisk attachment and replace it with the paddle attachment. In a separate bowl and using a fork, whisk the water, starter, and honey together with a fork until frothy. Add the starter mixture to the flour mixture and mix with the paddle attachment on low until the ingredients are evenly combined and a dough has formed. The dough will be slightly sticky to the touch. Cover the dough with a damp towel or plastic wrap and let rest for 30 minutes. This allows the gluten in the dough to rest, making it easier to shape.
- BULK RISE: After the dough has rested, knead the dough for 8-10 minutes on a lightly floured surface, or for 6-8 minutes with a KitchenAid or stand mixer (speed 1- 2 with dough hook). Next, transfer the dough into a large bowl. Cover the bowl with plastic wrap (this will allow the dough to retain moisture better than a towel) and let rise at room temperature overnight or until it has doubled in size.
- SHAPING THE DOUGH: In the morning, coat an 8.5 x 4 inch bread pan with an even layer of butter. Remove the dough from the bowl and place onto a lightly floured surface. Flatten the dough (in order to remove any air pockets) and shape the dough into a rectangle. Fold the long sides of the dough until they meet at the center. Fold the short sides of the dough upward. TIP: It helps to have the bread pan next to the dough in order to gauge length. Flip the loaf over and place into the buttered bread pan with the seam side facing down.
- SECOND RISE: Allow your dough to rise at room temperature until the top is about 1 inch above the bread pan. This can take 1-3 hours. Be careful not to let the dough get too tall. This can cause air pockets in your bread. Your bread will rise more in the heat of the oven.
- TIP: If you shape your bread in the morning but need to leave the house and return in the evening (work, errands, etc), you can place your loaf in the fridge to slow the second rise and set it back out at room temperature to finish rising once you are home.
- BAKE: Preheat the oven to 375 degrees Fahrenheit. Bake the dough on the center rack for 45-50 minutes or until the top is golden brown. Remove from the oven and take bread out of the pan to cool. Slightly peel back the wrapper of a stick of butter and apply a thin layer to the top and sides of the loaf. Wait for the loaf to cool before slicing. Enjoy by itself or warmed up with butter and honey!